5 Steps to a Beautiful macOS Terminal (No Font Glitches)

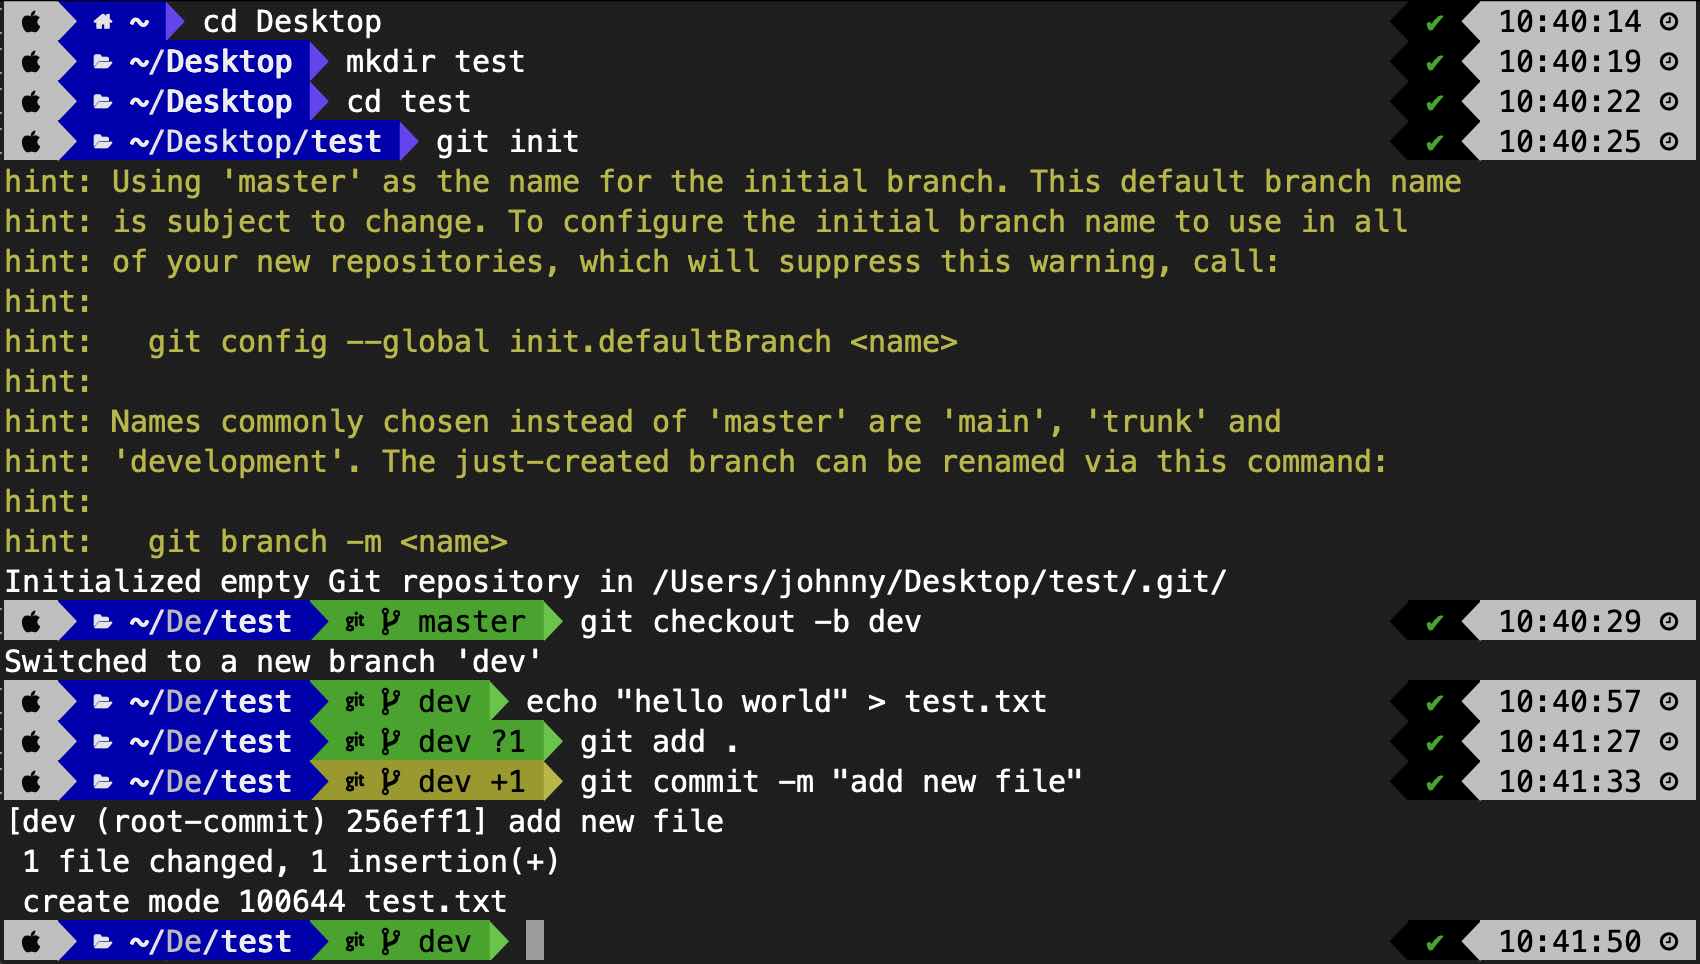
1 Introduction
As a programmer or developer, the terminal is probably the first tool you open when you sit down and the last one you close before you leave. But macOS’s built-in Terminal is pretty bare-bones — plain black text on a white background, and you have to run pwd just to remember which directory you’re standing in, or check which Git branch you’re on by hand. That grind wears down the mood for writing code all on its own.
Plenty of terminal-beautifying tutorials already exist online, but a lot of them skip steps, and following them often gets you stuck at the font or config-file stage, staring at a screen full of question marks and boxes. This article walks through the whole setup (Zsh + Oh My Zsh + Powerlevel10k) in 5 steps, explaining what each step actually does and why it’s needed, and finishes with the matching setting for VS Code’s built-in terminal.
2 Step 1: Install Zsh
Zsh (Z shell) is a shell built on top of Bash (Bourne Again SHell), and it’s also the default shell on macOS today. This entire setup is built on Zsh, so the first step is to confirm which shell your terminal is actually using:
echo $SHELLIf the output is Zsh (/bin/zsh), you can skip this step entirely. If not, install it via Homebrew:
brew install zsh3 Step 2: Install Oh My Zsh
Oh My Zsh is an open-source framework for managing Zsh configuration. In plain terms, it already writes the loading logic for themes and plugins for you — you just fill in the names you want in the config file, instead of hand-rolling a pile of shell scripts yourself. The theme used later in this article gets applied through it.
Run the following command to install Oh My Zsh:
sh -c "$(curl -fsSL https://raw.github.com/ohmyzsh/ohmyzsh/master/tools/install.sh)"If you see the screen below, the install succeeded!
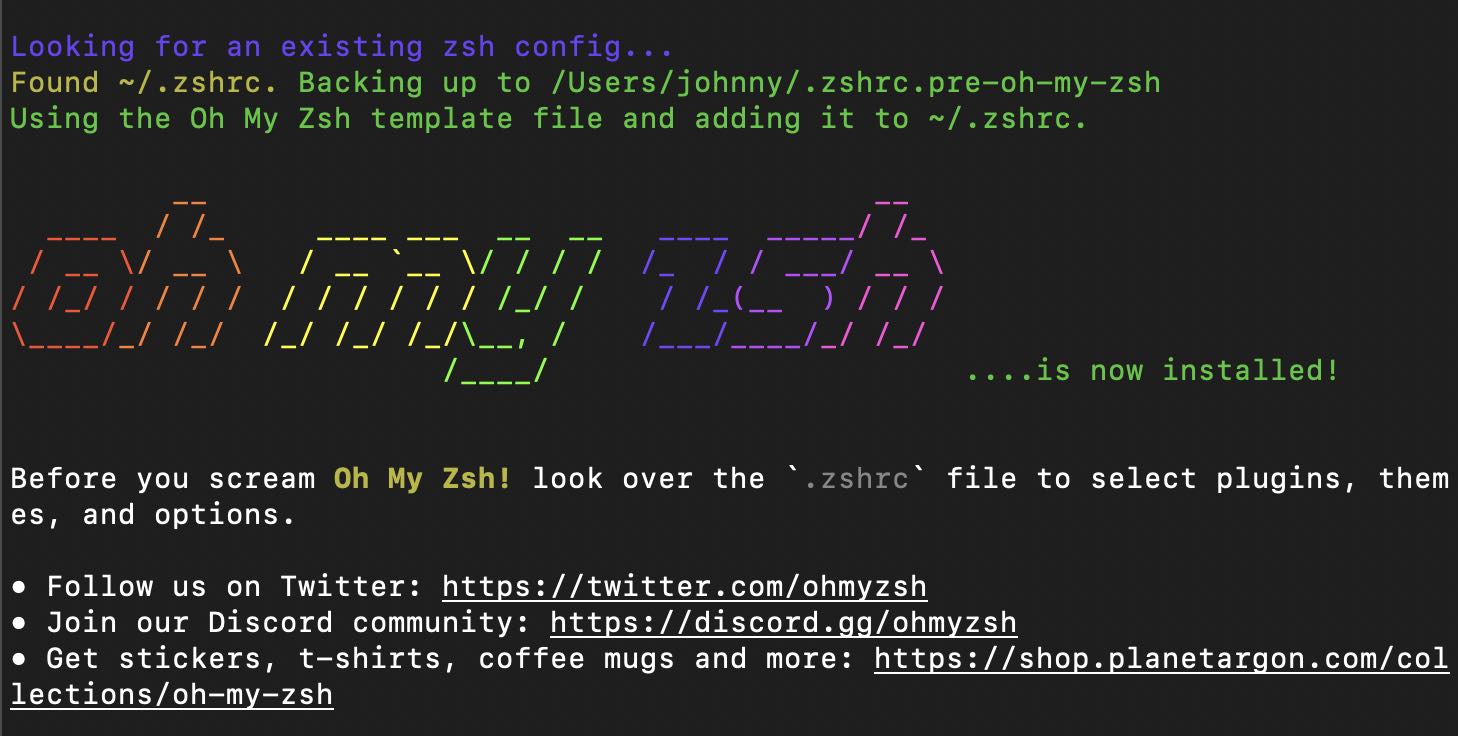
During installation, Oh My Zsh backs up your original ~/.zshrc and generates its own config file — that’s the file Step 3 is about to edit.
4 Step 3: Install a Zsh Theme
Powerlevel10k is a Zsh theme, and it’s the star of this article. It draws information like your current directory, Git status, and command execution time directly onto the prompt, so you can take it all in at a glance.
First, clone the Powerlevel10k GitHub repo into Oh My Zsh’s custom themes folder (/Users/user_name/.oh-my-zsh/custom/themes/). This is the path Oh My Zsh is set up to scan by convention — it only finds the theme if it’s placed here:
git clone --depth=1 https://github.com/romkatv/powerlevel10k.git ${ZSH_CUSTOM:-$HOME/.oh-my-zsh/custom}/themes/powerlevel10kNext, edit the ~/.zshrc config file to set the custom theme for Zsh:
nano ~/.zshrcFind the ZSH_THEME line and change it to the theme you just downloaded (powerlevel10k):
...

# ZSH_THEME="robbyrussell"
ZSH_THEME="powerlevel10k/powerlevel10k"

...
Save and exit (in nano, that’s control + O to save and control + X to exit).
5 Step 4: Install a Font for Powerlevel10k
To get the full benefit of the Powerlevel10k theme — that is, to have every style it offers actually render — you need a specific kind of font: Nerd Fonts.
The reason is that Powerlevel10k’s prompt uses a lot of icons (folders, Git branches, arrows, and so on), and these symbols simply aren’t part of a regular font’s character set. Without switching fonts, your screen fills up with question marks or empty boxes, which looks even worse than before you started beautifying anything.
First, download the MesloLGS NF Regular.ttf font. Then load it into macOS: just open Font Book (you can find it directly via Spotlight) and click the “+” button to load the font you just downloaded:
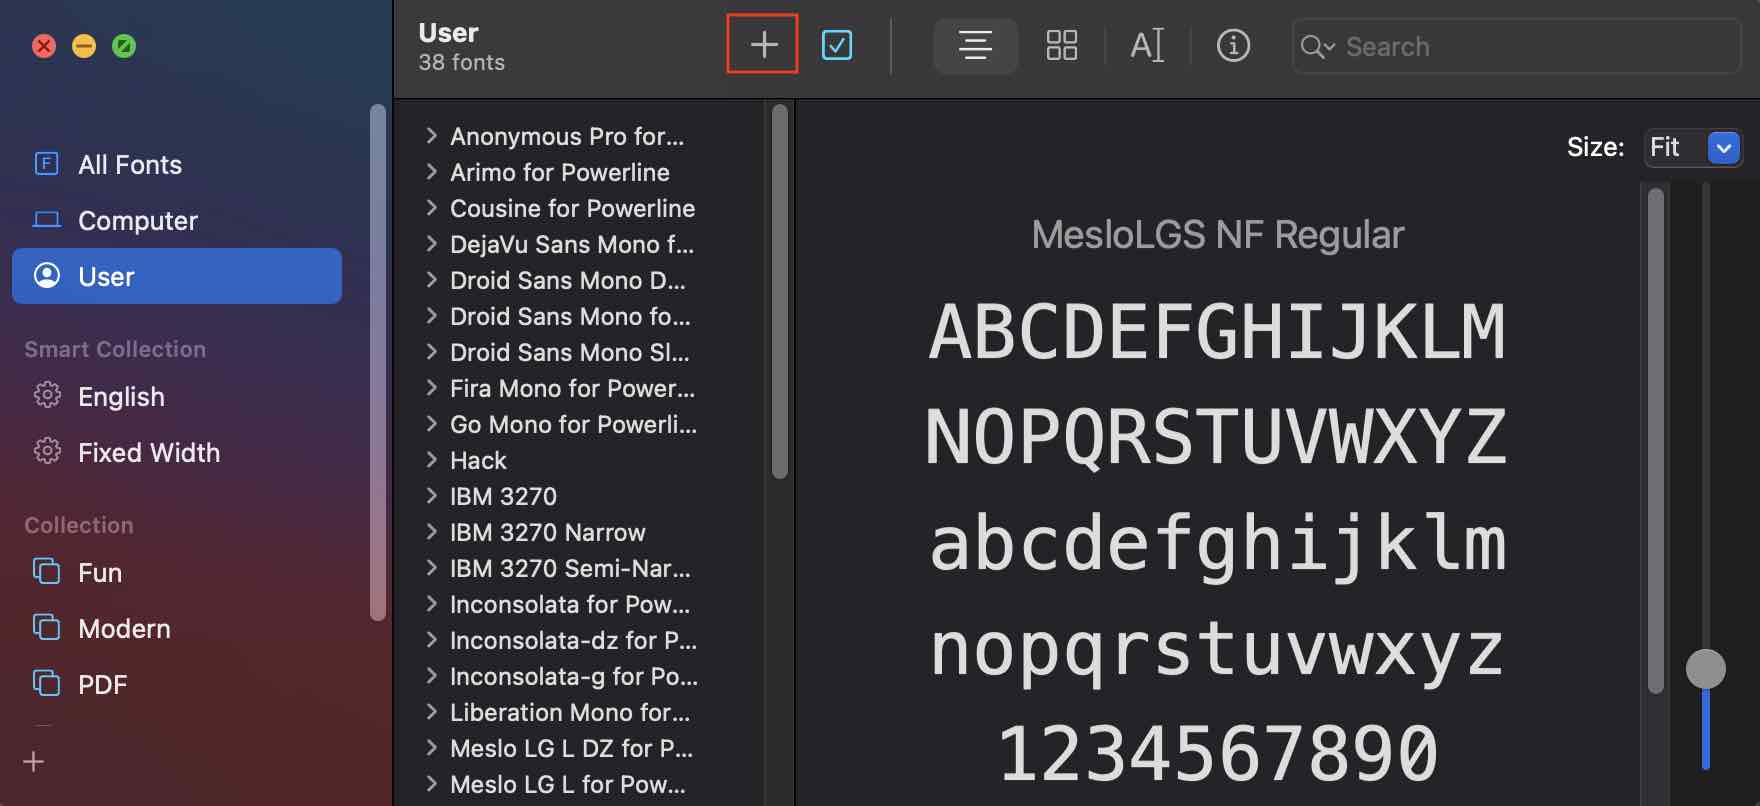
Once the font is loaded into macOS, you can select it for use in Terminal. Open Terminal, click “Terminal” in the top menu bar, then open “Preferences” (renamed to “Settings” from macOS Ventura onward). Click “Profiles,” then change the font in the “Font” section:
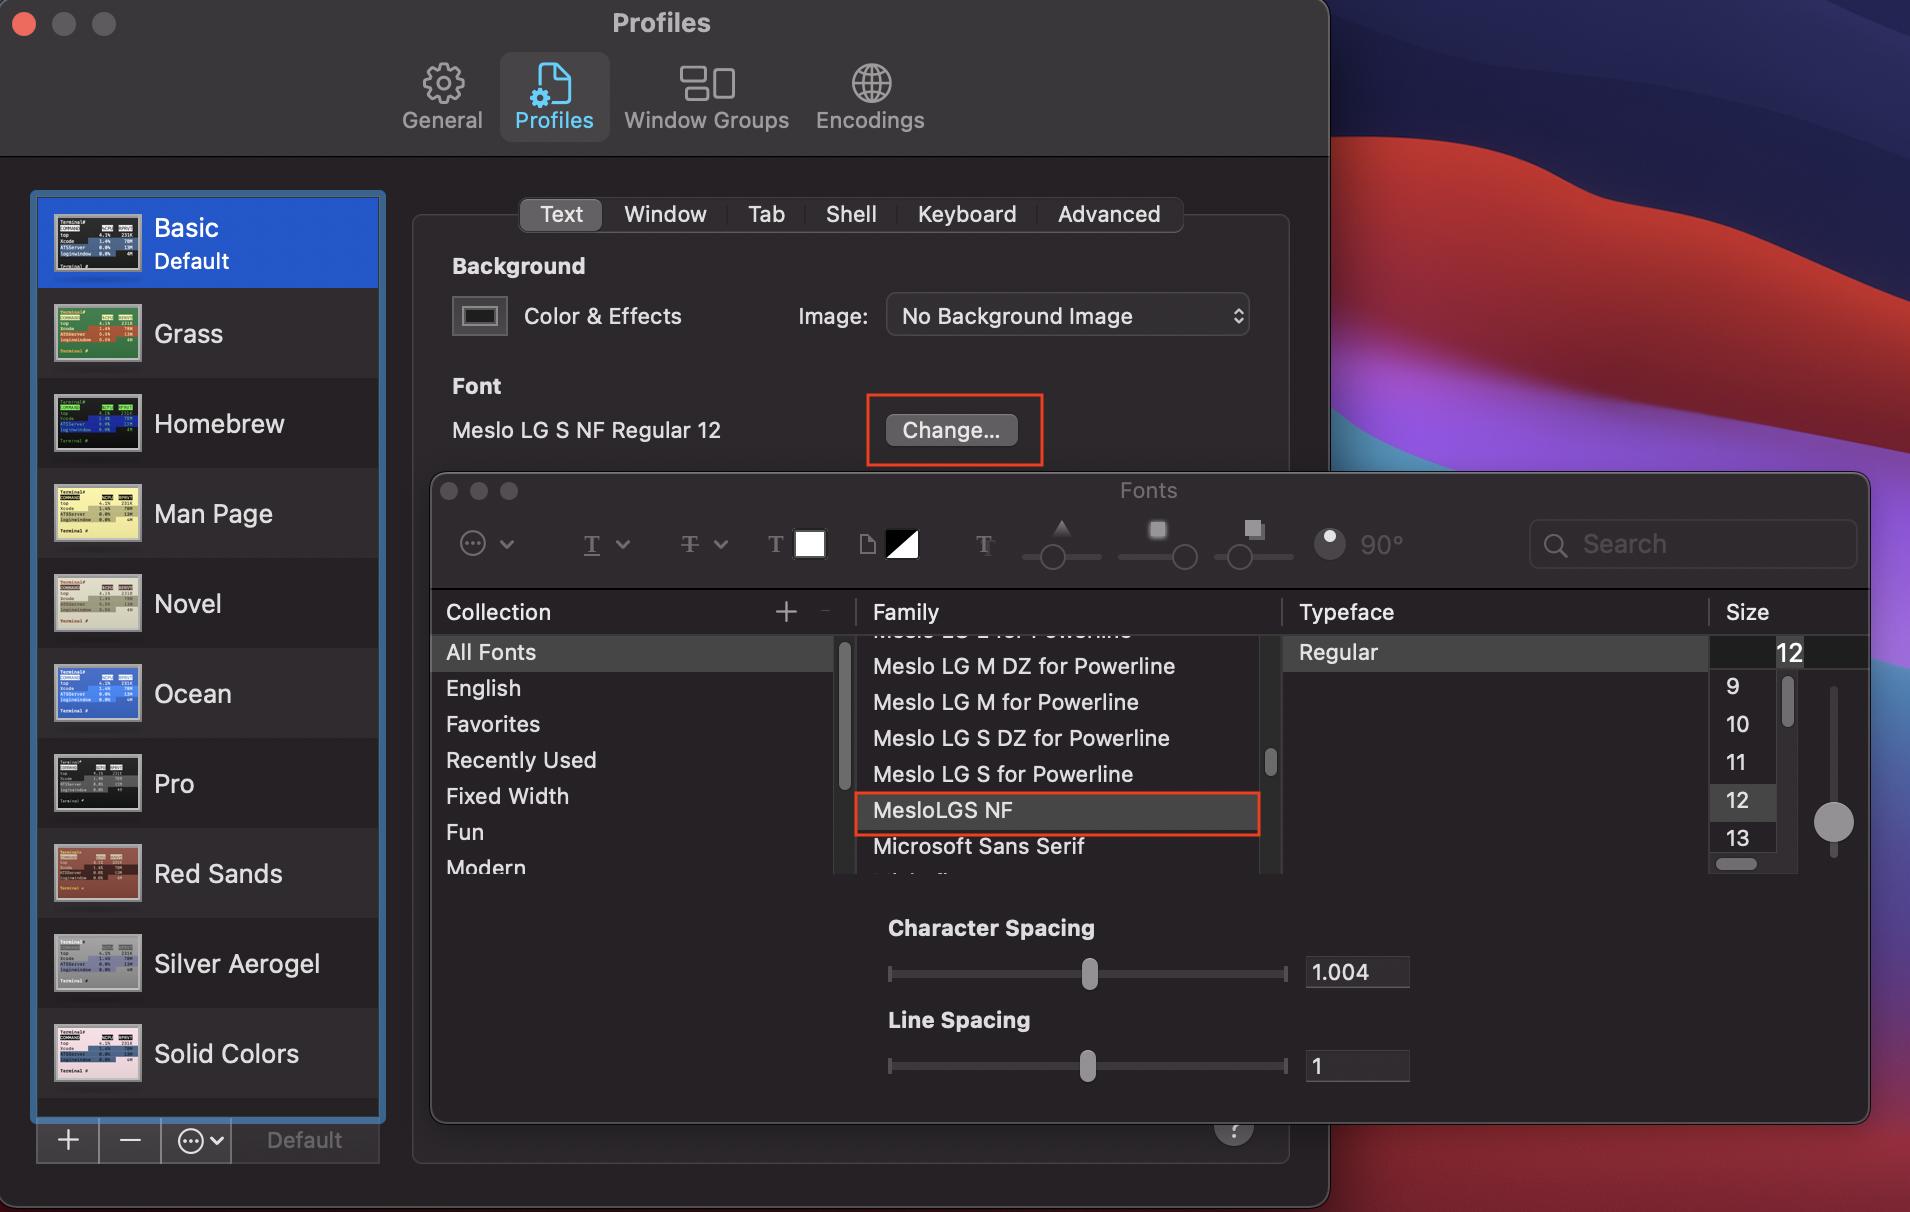
Here we pick MesloLGS NF. Once the font change is done, close Terminal so the next step starts from a clean session.
6 Step 5: Configure Powerlevel10k in Terminal
We’ve reached the last step. Reopen Terminal, and Powerlevel10k will walk you through a “question and answer” flow, asking one question at a time about what kind of prompt you want and generating the config based on your answers.
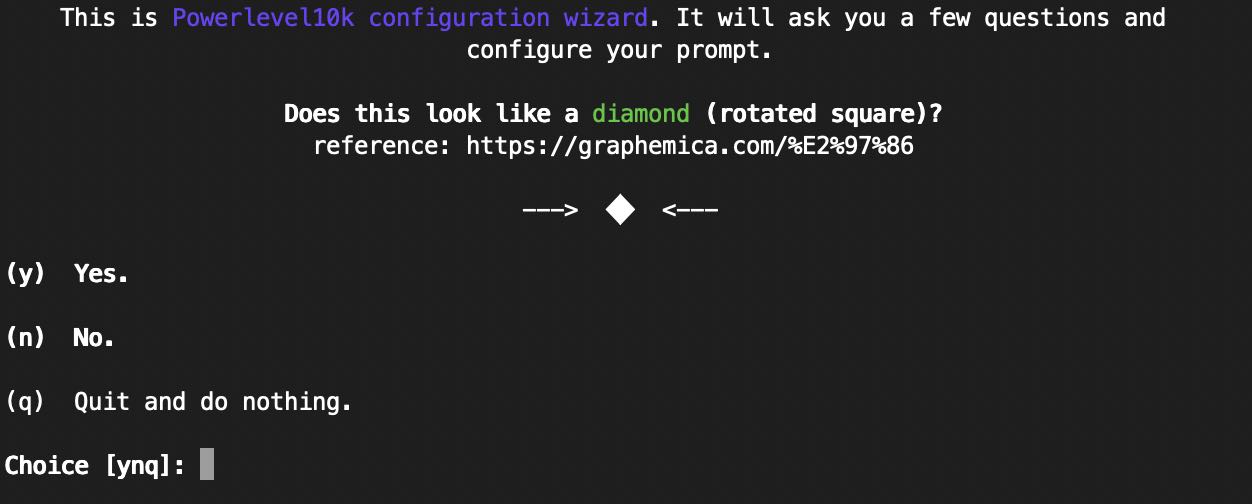
The first few questions ask you to confirm whether the icons on screen (diamonds, locks, and so on) are displaying correctly — this is really checking whether Step 4’s font got installed properly. The rest of the questions are about which style you prefer, so just pick whatever suits your taste.
If the wizard doesn’t show up automatically after you open Terminal, you can bring it up manually with:
p10k configureOnce you’ve answered every question, your terminal’s theme is fully configured. If you ever get tired of it or want something different, you can always run this same command again to reconfigure it.
7 Bonus: Terminal Settings in VS Code
If you, like me, use Visual Studio Code (VS Code) as your everyday editor, there’s one more setting you need to make in VS Code. The reason is the same as in Step 4: VS Code’s built-in terminal has its own font setting that doesn’t follow the system Terminal, so without changing it you’ll see the same pile of question marks.
First, open VS Code, click “Code” in the top menu bar, then “Preferences,” then “Settings” (newer versions of VS Code have simplified this to Code > Settings). In the search field, type “terminal.integrated.fontFamily” and enter “MesloLGS NF” in the box:
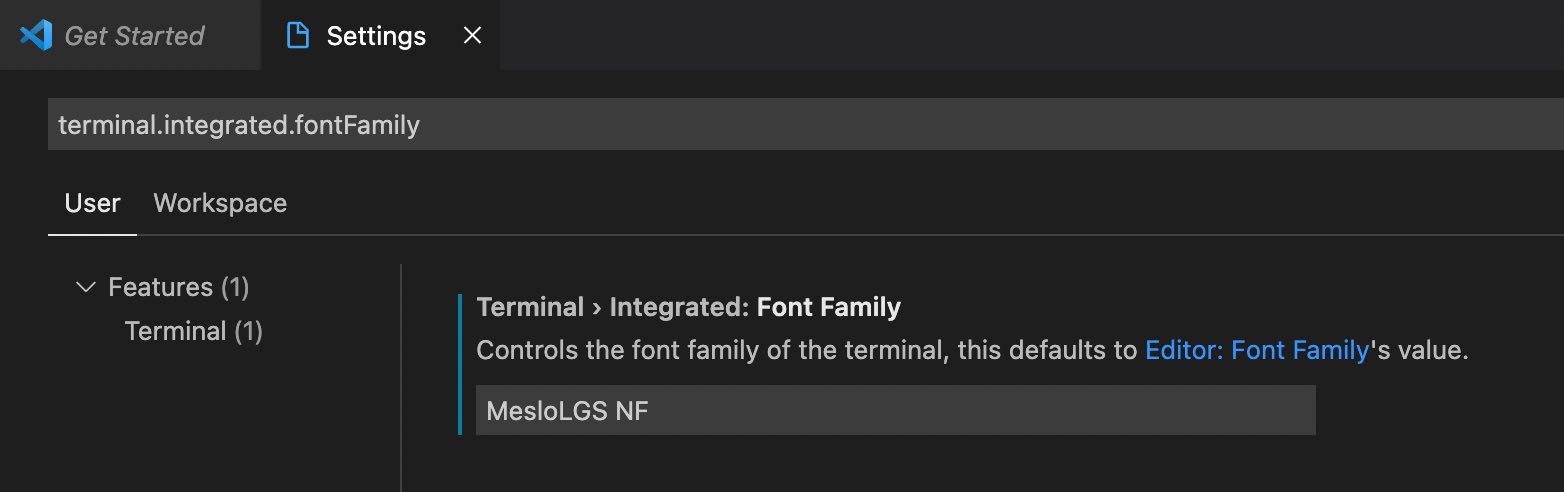
Save and reopen VS Code’s terminal, and its style will now match the system Terminal.
8 Conclusion
This article walked through beautifying the macOS Terminal in 5 steps: confirming your shell is Zsh, installing the Oh My Zsh configuration framework, cloning and applying the Powerlevel10k theme, installing a Nerd Fonts font, and finally running the interactive setup wizard. The step most likely to trip you up is the font step — question marks or empty boxes on screen almost always mean the font wasn’t installed or selected correctly, and going back to check Step 4 usually fixes it.
With a good-looking, informative terminal, the mood for development gets a little more beautiful too!