LINE Bot Tutorial: Build Your First Echo Bot

1 Introduction
LINE has over 20 million users in Taiwan, and businesses commonly use LINE Bots to strengthen their online sales channels. This article walks beginners through building their first LINE chatbot — an Echo Bot, meaning whatever you send it, it sends right back.
The feature sounds trivial, but getting that message from your phone to a server and back requires every piece to be wired up correctly: the SDK, Channel credentials, a Webhook, and a Function that can catch the HTTP request LINE sends. Getting an Echo Bot working means you’ve touched the entire skeleton of a LINE Bot once — everything you build afterward just grows on top of that same skeleton.
We’ll implement this in Python with Django as the backend, and deploy the app to Heroku so anyone can interact with the bot. Before starting, there are two prerequisites to complete:
- Set up a Django environment and successfully deploy it to Heroku (Heroku’s free tier was discontinued at the end of 2022, so a paid plan or an alternative PaaS is now required)
- Become a LINE Developer and create a Messaging API Channel
2 Step 1: Install the line-bot-sdk Package
With the two prerequisites above done, the coding groundwork is ready. First, install the required package for LINE Bot development inside your virtual environment:
pip install line-bot-sdkThis package is LINE’s official Python SDK. It wraps the API calls, signature verification, and message objects we’ll use later, so there’s no need to hand-roll HTTP requests.
3 Step 2: Get the LINE Channel Secret and Access Token
For the LINE Bot API to work, we first need the two keys tied to the Channel we created earlier: the Channel Secret and the Channel access token. The former verifies that “this request genuinely came from LINE”; the latter is our credential when we actively call the LINE API ourselves (for example, to reply to a message).
Log in to the LINE Developers Console and you’ll see the Channel you already added. Click into it and scroll to the bottom of the page to find the Channel Secret — copy it down.
Back in the Django project, open settings.py. Around line 25 you’ll find the SECRET_KEY variable; add a new variable below it to hold the LINE Channel Secret:
# SECURITY WARNING: keep the secret key used in production secret!
SECRET_KEY = 'YOUR_KEY'
LINE_CHANNEL_SECRET = 'YOUR_KEY' # Add this line
Then go back to the Console and open the Messaging API tab.
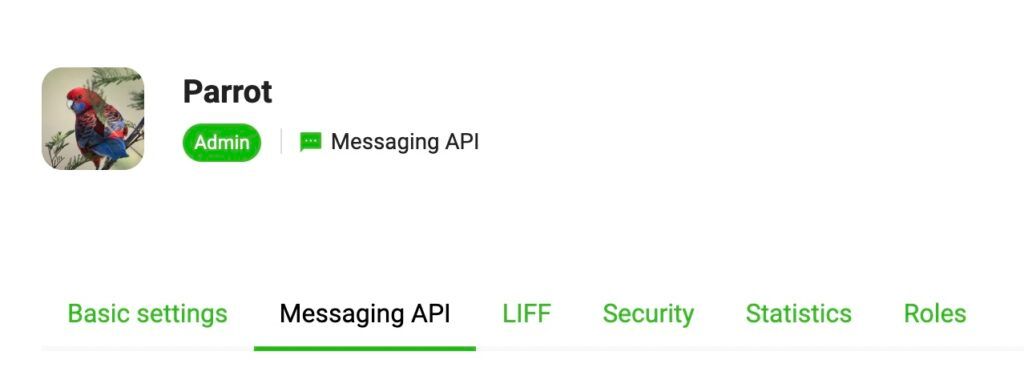
Scroll to the bottom of the page to find the Channel access token. If none has been issued yet, click issue, then copy the generated token. Back in settings.py, add another variable to store it:
# SECURITY WARNING: keep the secret key used in production secret!
SECRET_KEY = 'YOUR_KEY'
LINE_CHANNEL_SECRET = 'YOUR_KEY'
LINE_CHANNEL_ACCESS_TOKEN = 'YOUR_KEY' # Add this line
These two values are effectively the bot’s username and password. In practice, it’s best to store them in environment variables rather than hardcoding them in settings.py, especially if the project will be pushed to a public repository.
4 Step 3: Set the Webhook URL
Still on the Messaging API tab, you’ll find the field for setting the Webhook URL:
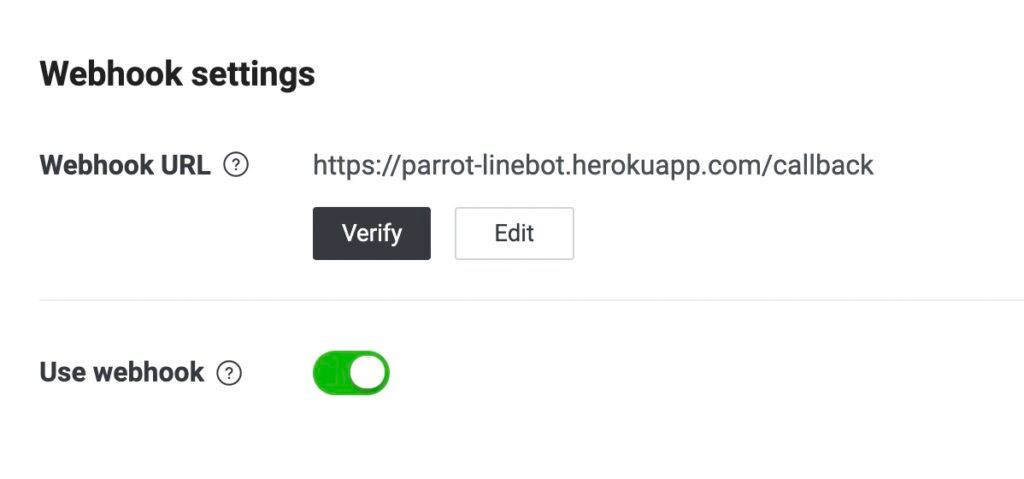
Once the Django app is deployed to Heroku, you’ll get a URL that can access it. Append callback to the end of that URL and enter it as the Webhook URL. Whenever the LINE Bot receives a message from a user, LINE’s servers will POST the data to this URL.
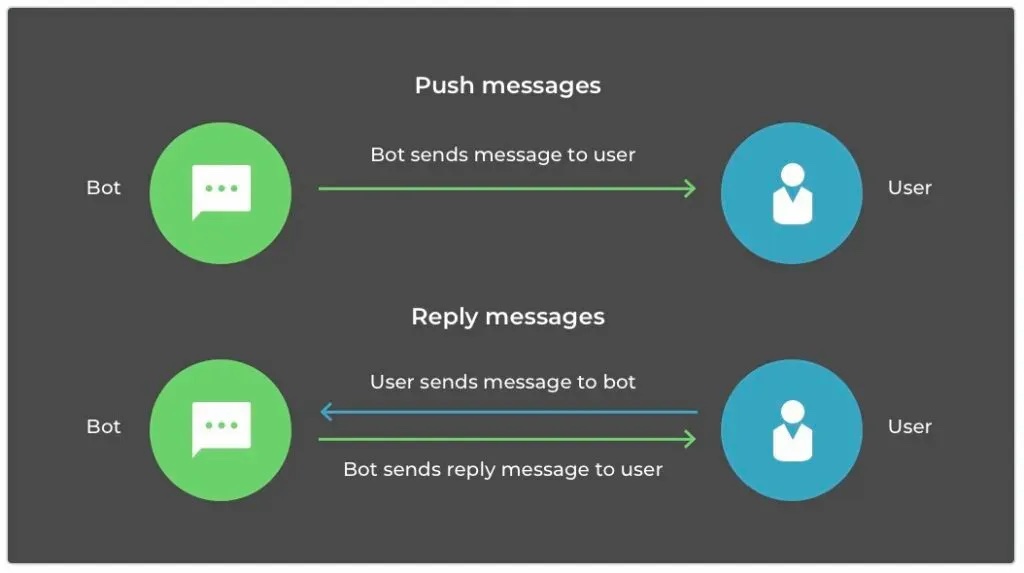
In other words, the bot doesn’t actively poll LINE asking “any new messages?” — LINE pushes the event to us instead. So what we need to do next is map this URL to a Function that handles the data LINE POSTs to it.
5 Step 4: Map the callback URL to a Function
Open urls.py and add the following imports, remembering to replace myapp with the name of the app you created:
from django.contrib import admin
from django.urls import path
from django.conf.urls import url # Add this line
from myapp import views # Add this line
Then, in the urlpatterns list, map the callback URL to the callback Function in views.py:
urlpatterns = [
    path('admin/', admin.site.urls),
    url(r'^callback', views.callback) # Add this line
]
6 Step 5: Add the callback Function
Finally, add a callback Function in views.py to handle the data LINE Bot POSTs to us. Start by importing what’s needed:
from django.conf import settings
from django.http import HttpResponse, HttpResponseBadRequest, HttpResponseForbidden
from django.views.decorators.csrf import csrf_exempt

from linebot import LineBotApi, WebhookParser
from linebot.exceptions import InvalidSignatureError, LineBotApiError
from linebot.models import MessageEvent, TextSendMessage
Next, use the LINE_CHANNEL_SECRET and LINE_CHANNEL_ACCESS_TOKEN defined in settings.py to create LineBotApi and WebhookParser objects:
line_bot_api = LineBotApi(settings.LINE_CHANNEL_ACCESS_TOKEN)
parser = WebhookParser(settings.LINE_CHANNEL_SECRET)
Then add the callback Function:
@csrf_exempt
def callback(request):
    if request.method == 'POST':
        signature = request.META['HTTP_X_LINE_SIGNATURE']
        body = request.body.decode('utf-8')

        try:
            events = parser.parse(body, signature)
        except InvalidSignatureError:
            return HttpResponseForbidden()
        except LineBotApiError:
            return HttpResponseBadRequest()

        for event in events:
            if isinstance(event, MessageEvent):
                line_bot_api.reply_message(event.reply_token, TextSendMessage(text=event.message.text))

        return HttpResponse()

    else:
        return HttpResponseBadRequest()
The key part of this code is first grabbing the data LINE Bot POSTs to us, then using parser to parse out the “events” it contains. If an event is a MessageEvent — meaning a user sent the LINE Bot a message — the bot replies with a piece of text: the exact message the user just sent. That’s where the echo behavior comes from.
A few details worth knowing up front, so debugging later goes more smoothly:
@csrf_exempt: The request comes from LINE’s own servers, so it won’t carry a Django CSRF token. Without this line, the request gets blocked outright.HTTP_X_LINE_SIGNATUREandparser.parse(): LINE signs the request body using the Channel Secret, andparse()raisesInvalidSignatureErrorif verification fails, which we respond to with a 403. This check exists to prevent someone from forging requests to your endpoint.event.reply_token: A one-time token used for replying to a message. It can only be used once and expires quickly, so you need to reply as soon as you receive the event.
7 Step 6: Redeploy Django to Heroku
The last step is deploying all these changes. Since we’ve added the line-bot-sdk package, we need to regenerate requirements.txt:
pip freeze > requirements.txtThen push the whole project to Heroku:
git push heroku masterOnce deployed, add the LINE Bot as a friend via its QR Code and send it a message. If it echoes back the exact same content, the entire pipeline works. Here’s the QR Code for the sample Echo Bot:
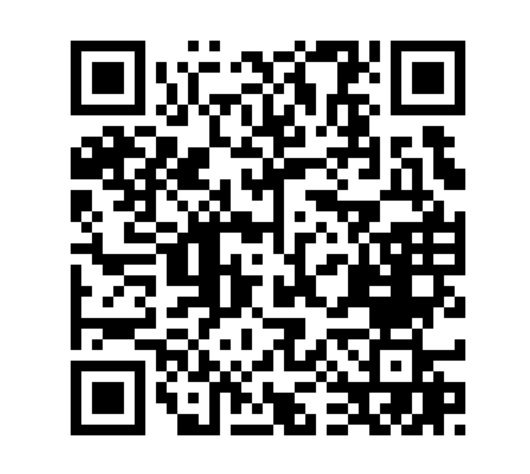
If you don’t get a reply, the three most common causes are: the “Use webhook” toggle wasn’t switched on for the Webhook URL, the URL is missing callback at the end, or the Channel Secret / access token was pasted incorrectly. Check the Heroku logs first to confirm whether the request is actually reaching Django.
8 Conclusion
Starting from installing the SDK, configuring Channel credentials, and setting the Webhook URL, all the way to writing the callback Function and redeploying, we’ve now completed our first LINE Bot — an Echo Bot that sends back whatever message a user sends it, unchanged.
The Echo Bot’s functionality is simple, but the entire flow — LINE pushes an event in, Django verifies the signature, parses the event, and replies with a message — has now been walked through end to end. Most future LINE Bot features will only differ in how callback interprets the event and what kind of message it sends back; this starting pattern will keep coming in handy.