How to Create a LINE Bot in LINE Developers

1 Introduction
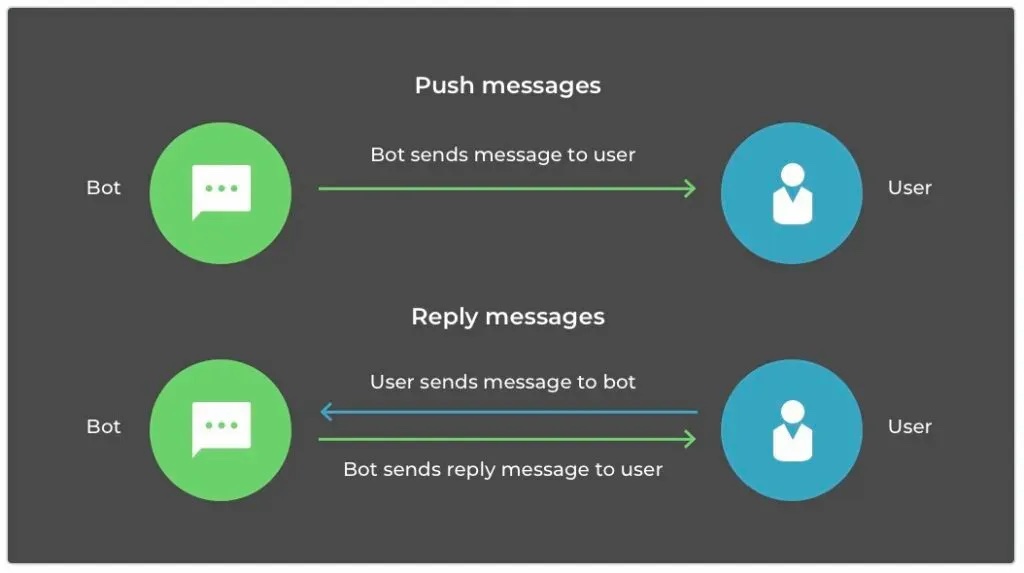
LINE is an extremely popular social app in Taiwan, and many businesses run an “Official Account” on it to manage an online channel and stay in touch with customers. This kind of official account is essentially a bot running on top of LINE: it can automatically reply to messages users send, and it can also proactively push information out to them. The technology behind all of this is the LINE Messaging API.
Before you can start writing any code, though, there’s a round of setup you can’t skip: registering a LINE Developers account, creating a Provider and a Channel, and turning off a handful of auto-reply features that are on by default so your own program actually gets a chance to respond. This article walks through that entire setup, building a LINE Bot from scratch and configuring everything you’ll need before wiring up your own code.
2 What Is the LINE Messaging API
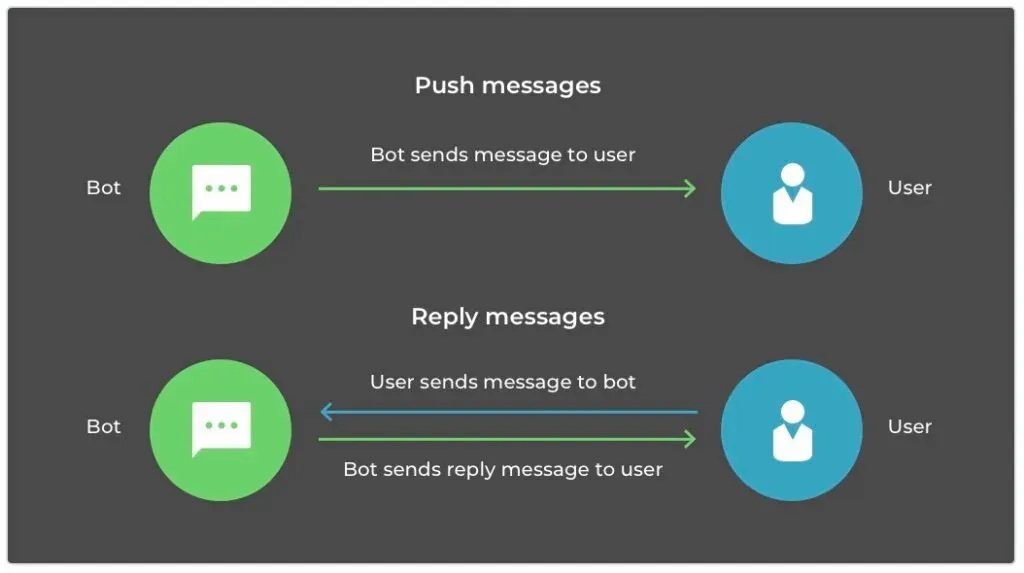
The LINE Messaging API is the interface LINE gives developers for sending and receiving messages. The flow splits into three parties: a user sends a message to the Bot inside the LINE app, the message first reaches the LINE Platform, and the LINE Platform then forwards that event to our own server; our program decides what to reply with, sends the reply back to the LINE Platform through the Messaging API, and only then does it show up in the user’s chat.
In other words, a LINE Bot isn’t a program living inside LINE — it’s a service we host ourselves. LINE’s job is only to bring messages in and send replies out. For a more complete picture of how this API behaves, see the official LINE documentation.
With that concept in mind, we can get started. Steps 1 through 4 below follow LINE’s own official tutorial. (The LINE Developers Console UI has been redesigned a few times over the years, so menu positions may not exactly match the screenshots below, but the field names and overall flow are largely the same.)
3 Step 1: Register a LINE Developers Account
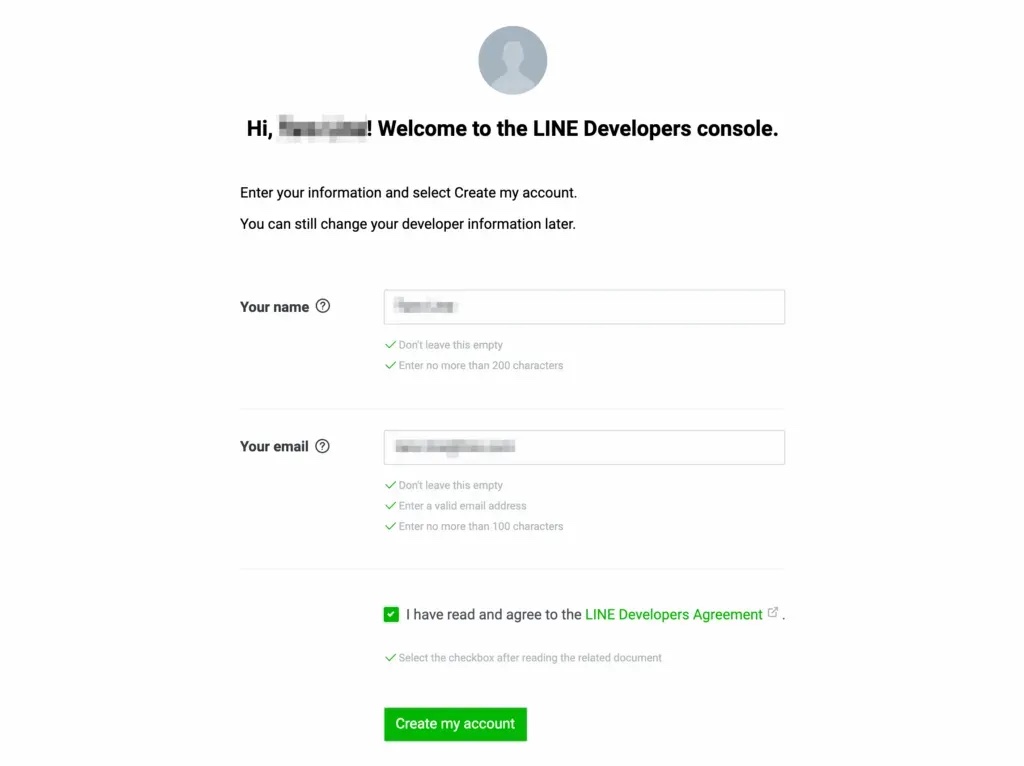
Go to the LINE Developers site to sign up, or log in directly with an existing LINE account. The first time you sign in to the LINE Developers Console, you’ll be asked to fill in some basic information (name, email); once that’s done you’ll land on the Console home page.
4 Step 2: Create a Provider
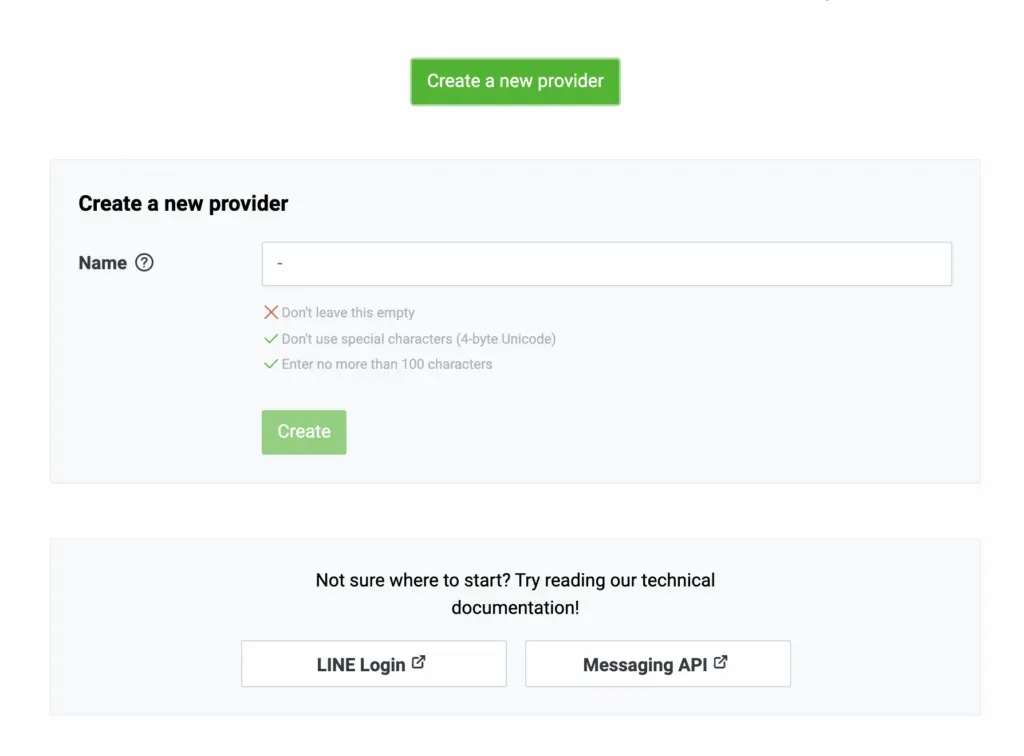
Next, create a new Provider — this step only asks for a name. A Provider represents “the entity providing the service”; you can use your own name or a company name. Think of it more as a container: a single Provider can hold many Channels, which makes managing multiple bots much easier down the road.
5 Step 3: Create a Channel
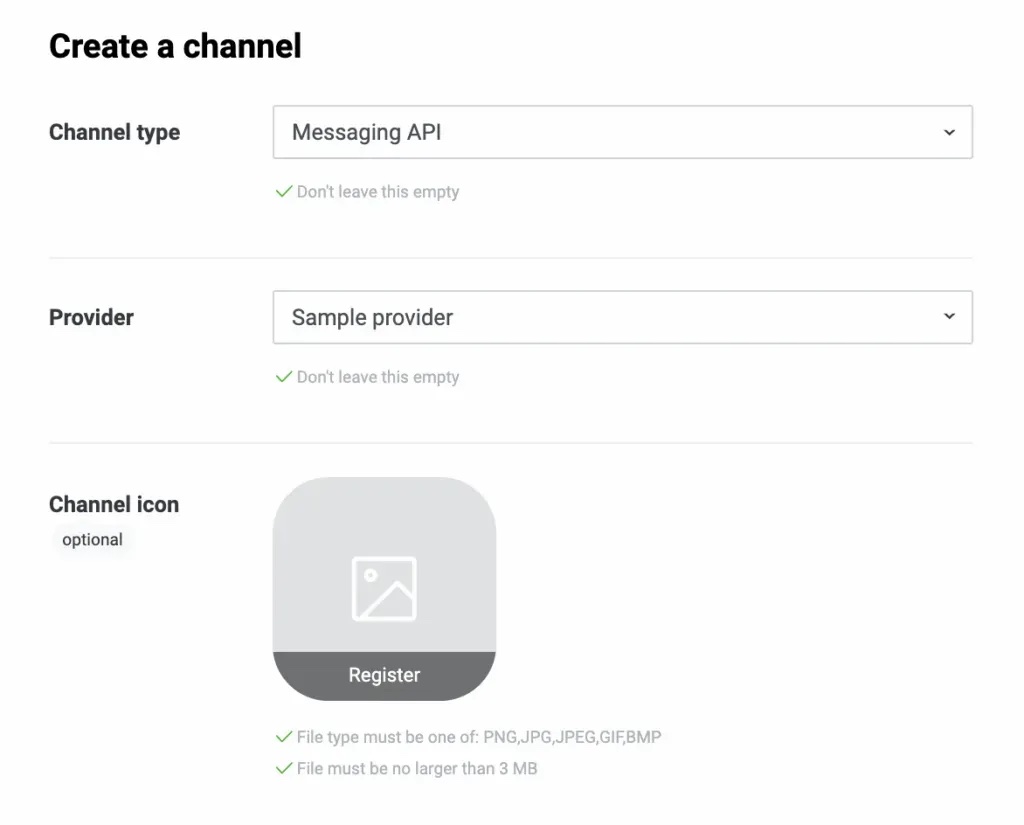
Once the Provider exists, create a Channel under it, choosing Messaging API as the type. You can think of this Channel as the LINE Bot itself.
The Channel icon and Channel name you fill in here show up directly inside users’ LINE app — they’re the avatar and name users actually see — so it’s worth filling in what you really intend to use from the start.
6 Step 4: Channel Created
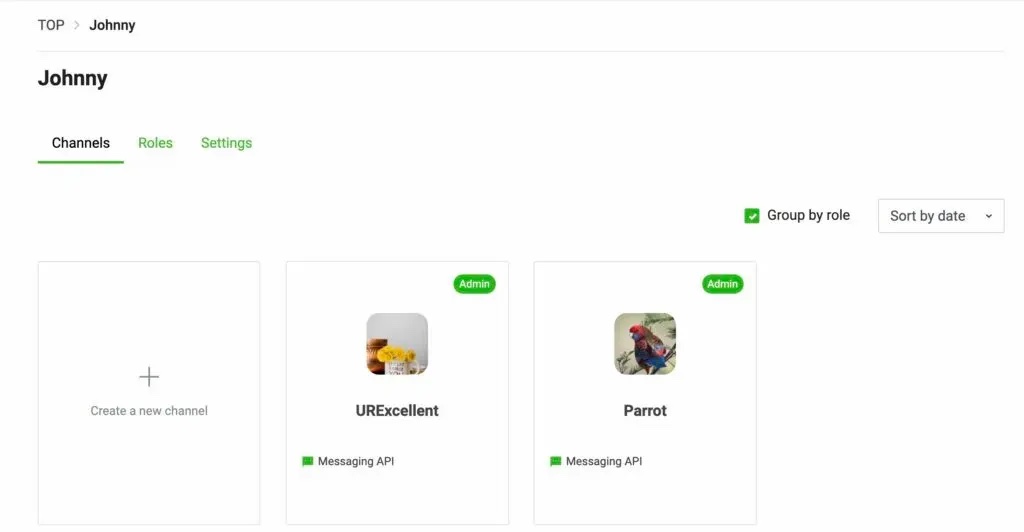
Once the Channel is created, going back to the Console page will show the Channel you just made. (In the screenshot below I’ve already created two Channels, so the list has two entries.)
7 Step 5: Adjust the LINE Bot’s Initial Settings
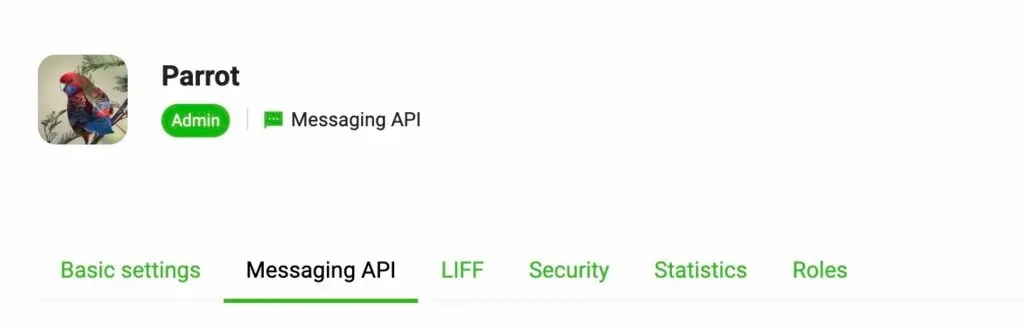
Click into the Channel you just created to configure this LINE Bot. First, switch to the Messaging API tab.
Scroll to the very bottom of the page, find the Allow bot to join group chats field, and click Edit.
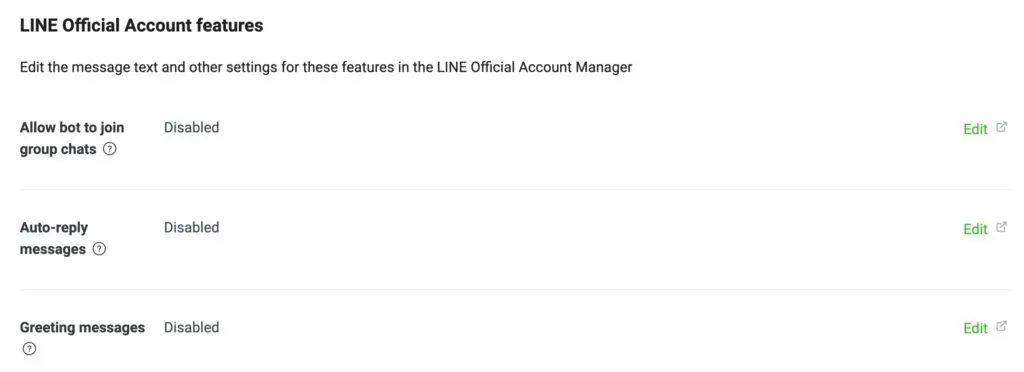
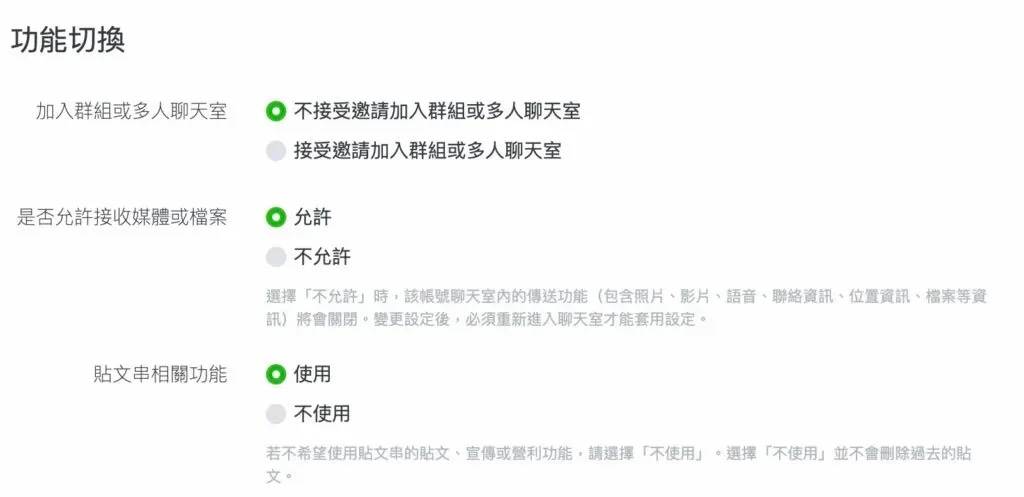
On the new page, in the toggle section, set the LINE Bot to not be allowed to be invited into group chats. It’s simpler to turn off group permissions early in development: once a bot is in a group, it receives message events from everyone in that group, which adds a lot of noise while you’re debugging. You can always turn group support back on later once you actually need it.
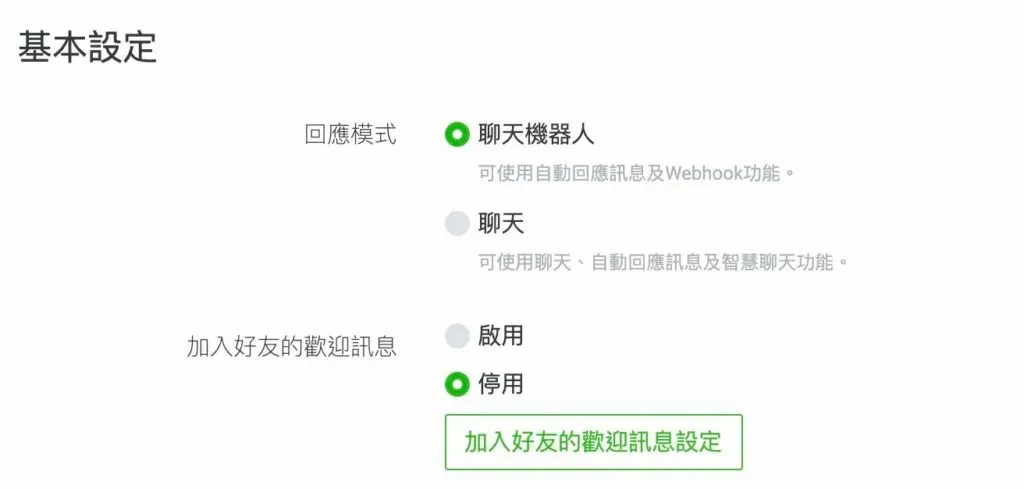
Back on the original page, click Edit next to Auto-reply messages. The new page shows two sections for this LINE Bot: “Basic settings” and “Advanced settings.”
Under “Basic settings,” set the response mode to “Chatbot” and set the greeting message to “Disabled.”
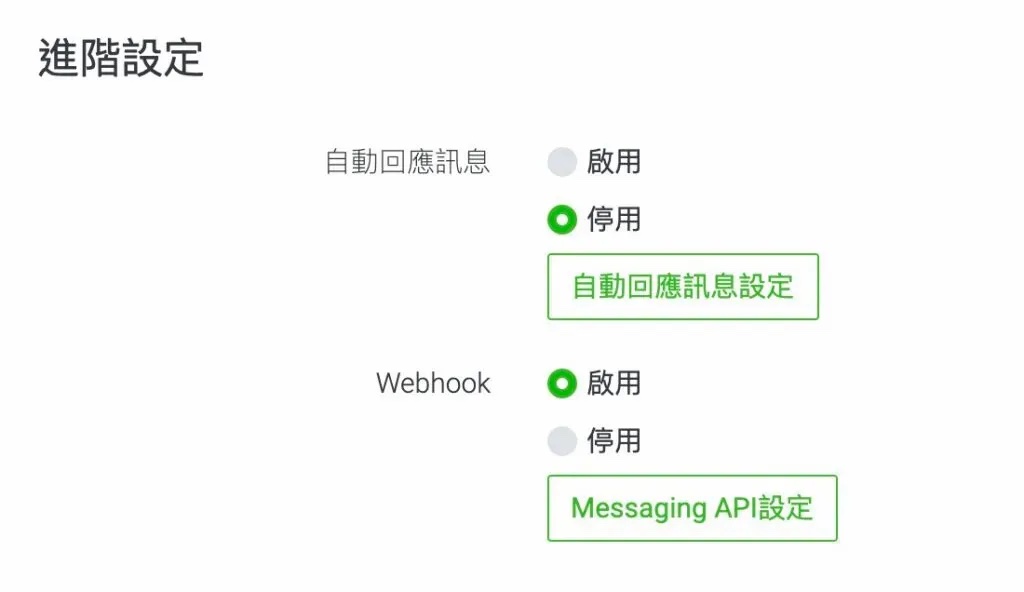
Under “Advanced settings,” set “Auto-reply messages” to “Disabled” and “Webhook” to “Enabled.”
These two switches are the most important part of the whole setup. By default, LINE replies to users with its own built-in canned messages; unless you disable “Auto-reply messages,” anyone who messages your bot gets that canned reply instead of anything your own program produces. “Webhook,” meanwhile, is the channel through which the LINE Platform forwards message events to our server — without enabling it, our program never receives any messages at all.
8 Step 6: Add the LINE Bot as a Friend
Once the basic settings are done, you can find this LINE Bot’s QR code on the Messaging API page. Scanning it with a phone automatically opens the LINE app and adds the bot you just created as a friend.
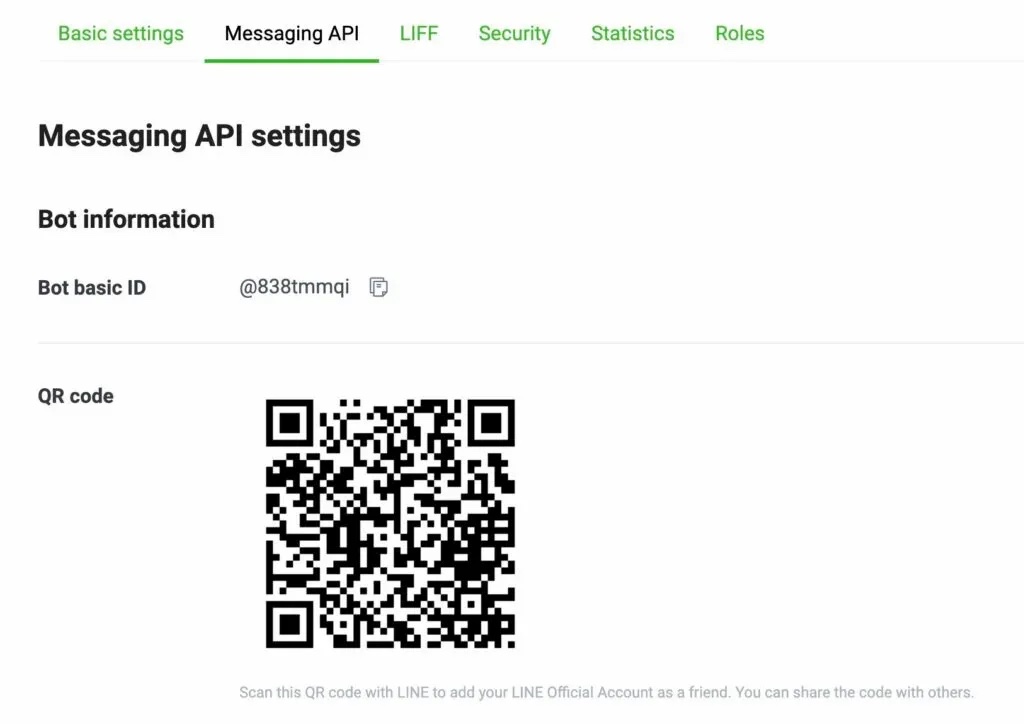
After adding it as a friend, you can do a quick sanity check: send the bot a message, and if it shows as “read,” that confirms the message really did reach the LINE Platform. It’s expected that the bot won’t reply at this point — we’ve already turned off its canned responses, and the program that will actually handle replies hasn’t been written yet.
9 Conclusion
This article walked through all the setup needed before writing any code for a LINE Bot: registering a LINE Developers account, creating a Provider and a Channel, and adjusting the group-chat permission, auto-reply messages, and Webhook switches into a state that’s suitable for development. Along the way, we also saw the role the LINE Messaging API plays in the whole flow — it’s the bridge between our own server and the user’s chat window.
The bot’s shell now exists. What’s next is writing the program that receives messages from users and replies with whatever content fits the service’s purpose.