Deploying a Django App to Heroku on macOS



1 Introduction
Once you’ve finished building a site on your local server, the next step is usually to make it public so other people can actually reach it. The trouble is that renting a machine, setting up the OS, and configuring a web server and database is a lot of overhead for someone who just wants to put a project online.
To shorten that path, a number of “Platform as a Service” (PaaS) tools have shown up — you push your code, and the platform takes care of the rest of the environment. This post uses Heroku as the example, walking from creating a virtual environment all the way through to deploying a brand-new Django app to the cloud. Everything here is done on macOS, and you can follow the commands directly.
2 What Is Heroku?

Heroku is a container-based “Platform as a Service” (PaaS). Developers can quickly deploy applications to Heroku and let Heroku manage the application’s resource usage. That means software developers don’t need to deal directly with managing hardware resources, which lowers the barrier to deploying software.
Put simply, there are only two things you need to do: organize your code into a Git repo, and tell Heroku what packages the app needs and what command to run it with. Once Heroku reads that information, it builds the runtime environment for you automatically.
3 Deploying a Django App to Heroku
Now that we’ve covered the basics of Heroku, let’s walk through the full process. We’ll start by creating a virtual environment with conda, and the whole flow breaks down into 6 steps:
- Create a virtual environment
- Install the required packages
- Create the Django project
- Add the files Heroku needs
- Initialize a local repo
- Push to Heroku to finish the deployment
4 Step 1: Create a Virtual Environment with conda
To keep projects isolated from one another, we’ll use conda to create a virtual environment that contains only the packages Django and Heroku need. This matters later, in Step 4: we’ll hand Heroku the environment’s package list via pip freeze, and if we used the system Python environment directly, that list would get polluted with a bunch of packages unrelated to this project.
Inside the virtual environment conda creates, we still install packages via pip, so if you don’t have conda installed, that’s fine too — you can use virtualenv to create the virtual environment instead, and the rest of the steps stay exactly the same.
First, open a terminal and run the following command to create a virtual environment named DjangoHeroku with Python 3.9.
conda create --name DjangoHeroku python=3.9Then, activate this virtual environment.
conda activate DjangoHerokuAt this point, your terminal prompt should now be prefixed with (DjangoHeroku). That prefix is the most direct way to tell whether you’re currently inside the virtual environment or not.
5 Step 2: Install the Required Packages
In this step, we need to use pip to install a few packages so the Django app can be deployed to Heroku successfully. First, check the current pip version and its location.
pip --versionYou should see something like this:
pip 21.2.4 from /Users/xxxxx/miniforge3/envs/DjangoHeroku/lib/python3.9/site-packages/pip (python 3.9)The thing to check here is the envs/DjangoHeroku segment in the middle of the path — it confirms you’re really using the pip inside the virtual environment, not the system one. If the path looks wrong, go back and make sure you ran conda activate.
Next, install the django package.
pip install djangoInstall the gunicorn package. gunicorn is the production-grade WSGI server, and Heroku will use it to run our app instead of Django’s built-in development server.
pip install gunicornNext up, the package we’re about to install depends on the PostgreSQL driver for Python (psycopg2), so PostgreSQL needs to be installed on your machine first for that to succeed. You can download and install it from PostgreSQL Download. Then, run the following command to install the Postgres CLI.
sudo mkdir -p /etc/paths.d && echo /Applications/Postgres.app/Contents/Versions/latest/bin | sudo tee /etc/paths.d/postgresappThis command adds the executable path from Postgres.app to your system PATH, so you can call psql directly from the terminal afterward. Once that’s done, restart your terminal and confirm PostgreSQL installed successfully.
which psqlSeeing the following output means the installation succeeded:
/Applications/Postgres.app/Contents/Versions/latest/bin/psqlSince we just restarted the terminal, we need to activate the virtual environment again.
conda activate DjangoHerokuOnce you’re back inside the virtual environment, install the django-heroku package. This package configures all the settings the Heroku environment needs in one shot — database connection, static files, logging, and so on — saving you the trouble of editing a pile of settings by hand. (This package is no longer maintained today; following along with it here is fine, since this is a historical tutorial, but if you’re starting a brand-new project now, it’s worth looking into alternatives.)
pip install django-herokuFinally, check that all the required packages installed correctly.
pip listYou should see the following output, showing the installed packages:
Package         Version
--------------- -------
asgiref         3.4.1
dj-database-url 0.5.0
Django          3.2.7
django-heroku   0.3.1
gunicorn        20.1.0
pip             21.2.4
psycopg2        2.9.1
pytz            2021.1
setuptools      58.0.3
sqlparse        0.4.1
wheel           0.37.0
whitenoise      5.3.0
Notice that we only manually installed four packages, yet the list is a lot longer than that — that’s because django-heroku pulled in dj-database-url, psycopg2, and whitenoise as dependencies along the way.
6 Step 3: Create the Django Project
With the necessary packages installed, we need to create a Django project before we can deploy it to Heroku. First, switch to the Desktop directory.
cd ~/DesktopCreate a Django project on the Desktop named MyFirstProject.
django-admin startproject MyFirstProjectSwitch into this project’s directory.
cd MyFirstProjectAdd a new application inside the project, named myapp.
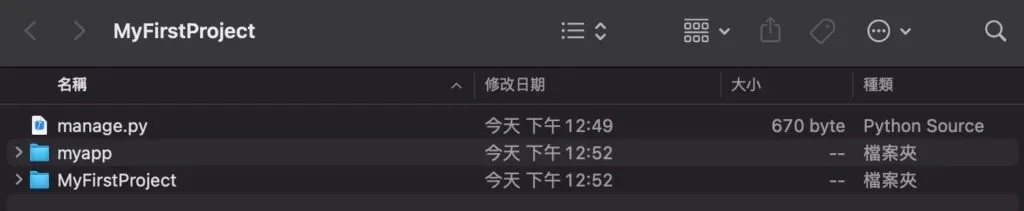
python manage.py startapp myappA quick note on Django terminology: a Project is the whole site, while an Application is one functional module underneath it — a single Project can host many Apps. At this point, MyFirstProject’s structure looks like this:
Next, we need to make a few edits to settings.py inside the MyFirstProject/MyFirstProject folder. First, around line 13, import two more packages.
import os
import django_heroku
Around line 35, add the app we just created to the INSTALLED_APPS list. Without this line, Django won’t recognize myapp.
INSTALLED_APPS = [
    'django.contrib.admin',
    'django.contrib.auth',
    'django.contrib.contenttypes',
    'django.contrib.sessions',
    'django.contrib.messages',
    'django.contrib.staticfiles',
    'myapp'  # add this line
]
Around line 124, add the STATIC_ROOT path. This is the output directory Django collects static files into, and it must be set for deployment to Heroku — otherwise your CSS and images won’t be found.
STATIC_URL = '/static/'
STATIC_ROOT = os.path.join(BASE_DIR, 'staticfiles')
Finally, add this line at the very end of settings.py, so django-heroku can override the settings with what the Heroku environment needs:
django_heroku.settings(locals())In Django, all images, CSS, and JS files live under a static folder, so add a static folder under both MyFirstProject/MyFirstProject and MyFirstProject/myapp.
mkdir MyFirstProject/static
mkdir myapp/static
Finally, sync up the database. The first command generates migration files based on your model definitions; the second actually applies those changes to the database.
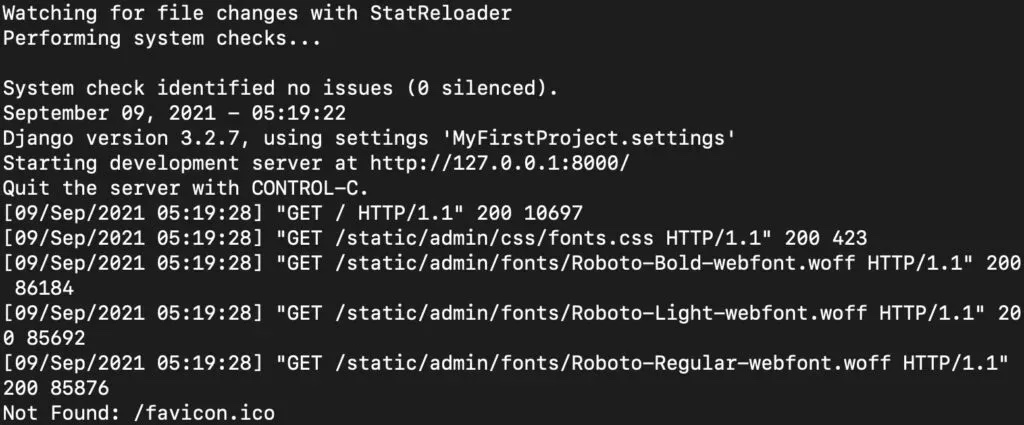
python manage.py makemigrationspython manage.py migrateAt this point, we’ve finished setting up the Django project, and we can use the following command to view our site on the local server.
python manage.py runserverYou should see the following output:
In your browser, visit the following address to see Django’s default page.
http://127.0.0.1:8000/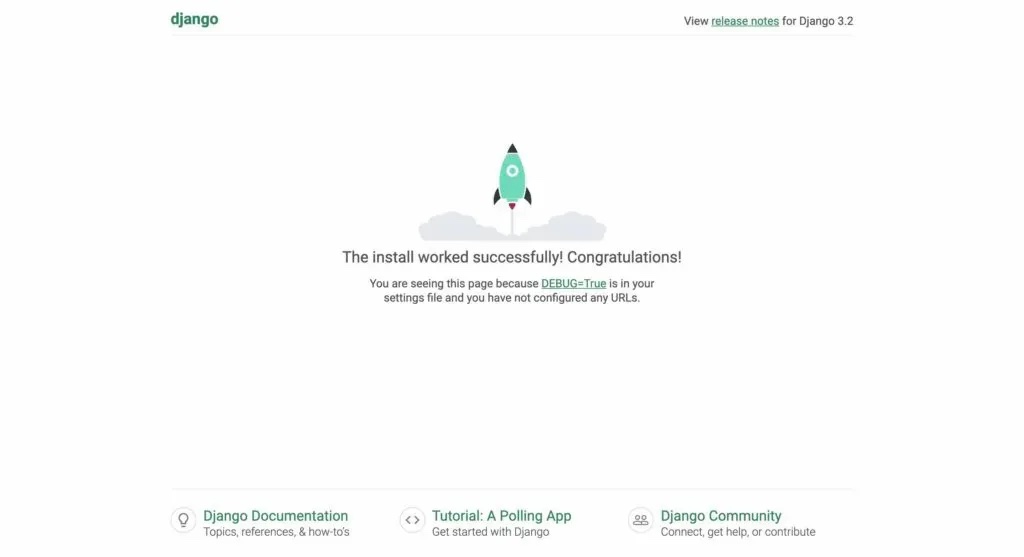
Seeing this page confirms your Django project was set up correctly. Back in the terminal, press Ctrl+C to stop the local server.
7 Step 4: Add the Files Heroku Needs
Now that the Django project is up and running, we still need to prepare a few files so Heroku knows what packages to install and what command to run our app with. This step is the bridge between local development and cloud deployment: on your own machine, all of this information is tucked away inside the virtual environment, which Heroku can’t see — so it has to be written out to files instead.
First, check the current project structure:
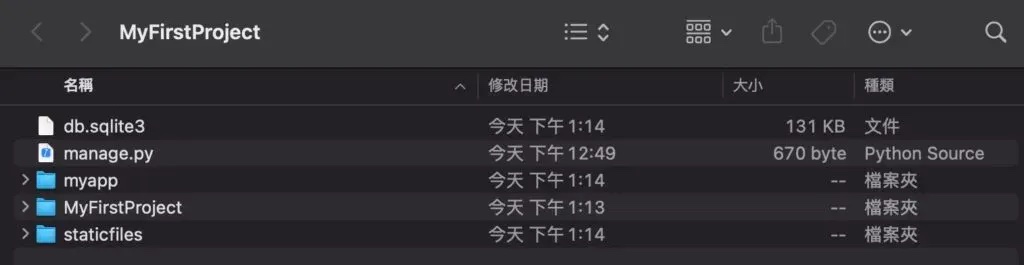
Next, run the following command to generate a Procfile. A Procfile consists of <process type>: <command> entries that tell Heroku what command to run for our app. Here, web means this is a process that receives HTTP requests from outside, followed by the command that starts MyFirstProject’s WSGI app with gunicorn.
echo 'web: gunicorn MyFirstProject.wsgi' > ProcfileWe also need to tell Heroku which packages our app depends on. pip freeze writes every package in the virtual environment, along with its version, into requirements.txt, and Heroku installs from that list when it builds.
pip freeze > requirements.txtFinally, we need to tell Heroku which Python version we’re using.
python --versionThis gives:
Python 3.9.7Generate a runtime.txt with the Python version written inside. Note the format is python- followed by the version number, not the raw output pasted directly.
echo 'python-3.9.7' > runtime.txtCheck the project structure once more — it should now have the three files we just generated:
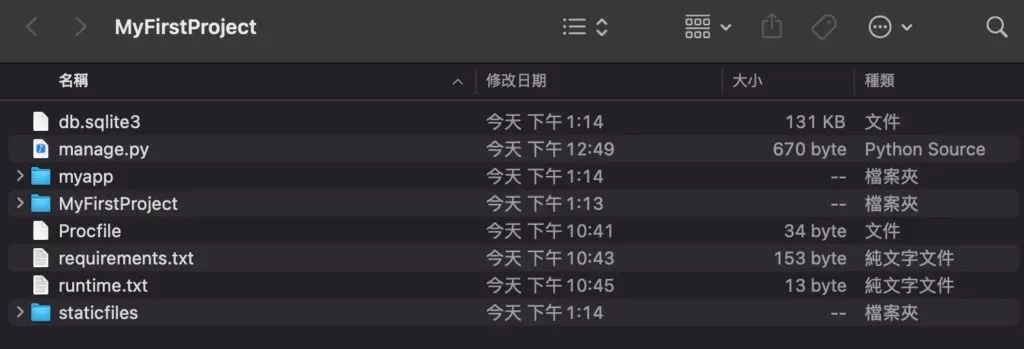
8 Step 5: Initialize a Local Repo
With the files Heroku needs in place, we need to turn the whole Django app project into a local repo. Heroku’s deployment model is “git push” — so from now on, any change in the project just needs the repo pushed again to trigger a redeploy. (If you install any new packages, remember to regenerate requirements.txt, or Heroku won’t know about the new dependency.)
Initialize the local repo:
git init
git add .
git commit -m "create django app"
9 Step 6: Deploy the Django App to Heroku
In this final step, we’ll push the local repo to the remote repo on Heroku’s platform, completing the Django app’s deployment.
First, sign up for an account at Heroku. (The original tutorial mentioned a free account, but Heroku discontinued its free tier in November 2022, so you’ll need a paid plan to actually run this today.) Next, log in to Heroku from the terminal as well.
heroku loginPress Enter and you’ll be able to log in through your browser. Then, create an app on Heroku named my-first-project-django. Note that Heroku app names are unique across the entire platform, so you’ll need to pick a name that isn’t already taken — and use that same name in the following commands and URLs.
heroku create my-first-project-djangoNext, configure where the local repo should actually be pushed to.
heroku git:remote -a my-first-project-djangoThis gives:
set git remote heroku to https://git.heroku.com/my-first-project-django.gitFinally, push our local repo up.
git push heroku masterAt this point, Heroku builds the environment based on the Procfile, requirements.txt, and runtime.txt in the local repo. The entire build process is printed directly to the terminal, so if any package fails to install, you’ll see the error there. In the end, you’ll get the URL your app is deployed at on Heroku:
https://my-first-project-django.herokuapp.com/Before opening the page, you also need to scale up at least 1 dyno to run the app. A dyno is the container Heroku uses to run your app — with a count of 0, the app isn’t running at all.
heroku ps:scale web=1Once that’s done, visit the URL in your browser — if you see the page below, you’ve successfully deployed the Django app to Heroku! This is the exact same Django default home page we saw earlier at 127.0.0.1:8000, except now it’s running in the cloud, on an address anyone can reach.
10 Conclusion
This post walked through the full process of shipping a Django app to Heroku, starting from a conda virtual environment, through installing packages and creating the Django project, adding the Procfile / requirements.txt / runtime.txt files Heroku needs, and finally deploying with a git push.
The real key idea is a single concept: Heroku can’t see the environment on your own computer, so you have to write out “what to install, how to run it, and which Python version to use” into files and hand them over. Once you understand that, moving to any other PaaS platform follows the exact same logic.