How to Connect a Custom Domain to Your AWS Lightsail WordPress Site


1 Introduction
This is the third article in our Lightsail x WordPress series! In the first article (How to Build Your Website with AWS Lightsail and WordPress), we covered how to rent your own server on AWS Lightsail and set up a WordPress site on it.
Then, in the second article (Lightsail x WordPress: How to Back Up and Restore Your WordPress Site), we shared how to safely and effectively back up and restore your website, and also mentioned potential pitfalls you might encounter during the restoration process. In this article, we will show you how to connect an existing domain to your WordPress site!
A domain is like a signboard for your website. If you want to seriously run your blog or online store, you must connect a domain to your site. Otherwise, people can only access it using your server’s public IP address :D
2 Getting a Domain on Namecheap
If you haven’t purchased a domain yet, I recommend using Namecheap! Of course, there are many domain providers on the market, so feel free to do some research and choose the one you like best. This article will use Namecheap as an example. There are already many tutorials online about how to buy a domain on Namecheap, so we won’t go into detail here.
3 Configuring DNS Records in AWS Lightsail
After purchasing your domain on Namecheap, we need to configure some settings in AWS Lightsail to direct users to our website when they type the domain into their browser. First, click on “Domains & DNS” in the Lightsail sidebar:
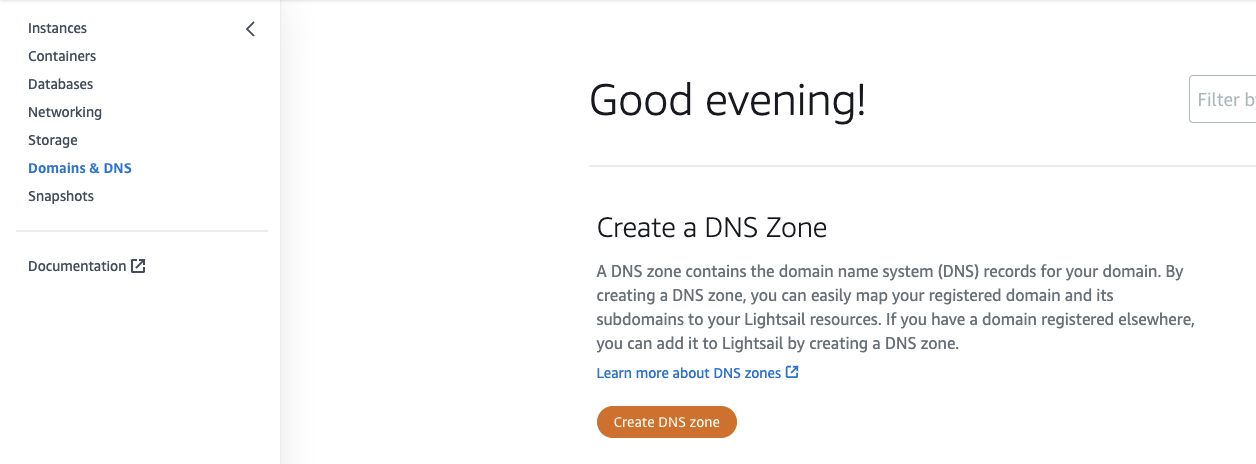
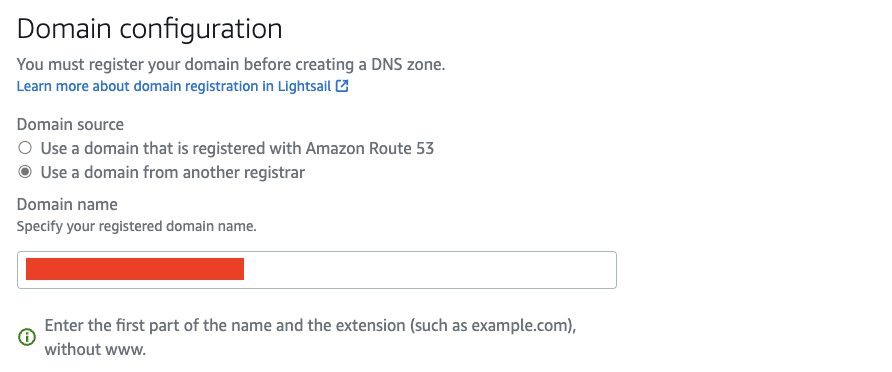
Next, click “Create DNS Zone” and enter your domain name. For the Domain Source, if you got your domain from the AWS Route 53 service, you should select the first option:
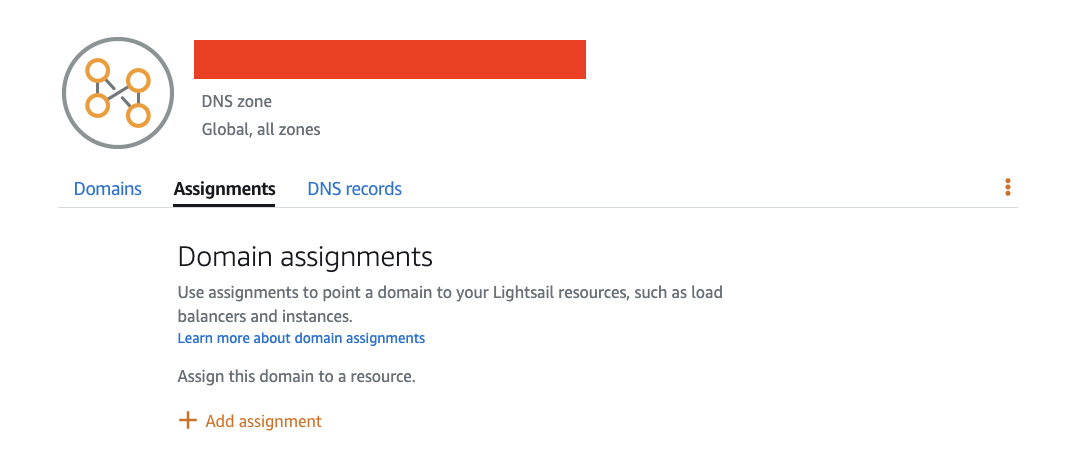
After creating the DNS Zone, click the “Assignments” tab, and then click “Add assignment”:
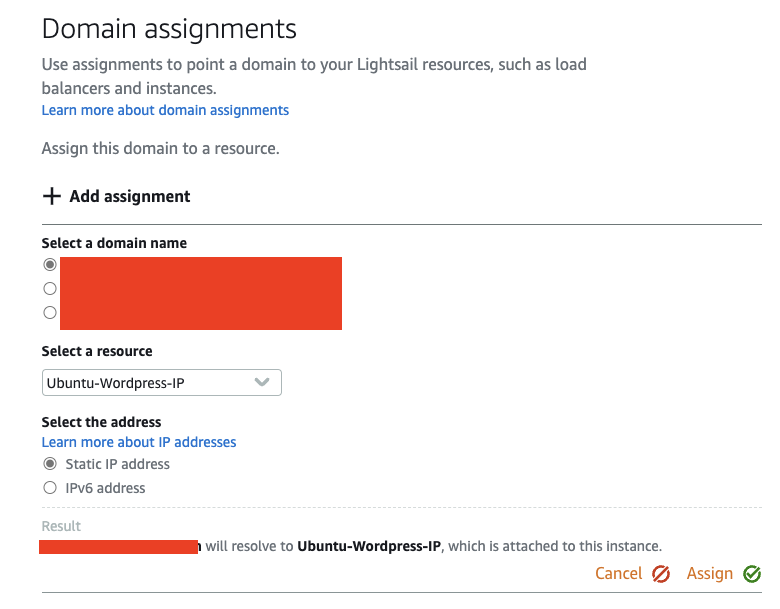
Assign your domain to your static IP (if you don’t know how to set up a static IP for your server in Lightsail, you can refer to the supplement at the end of this article):
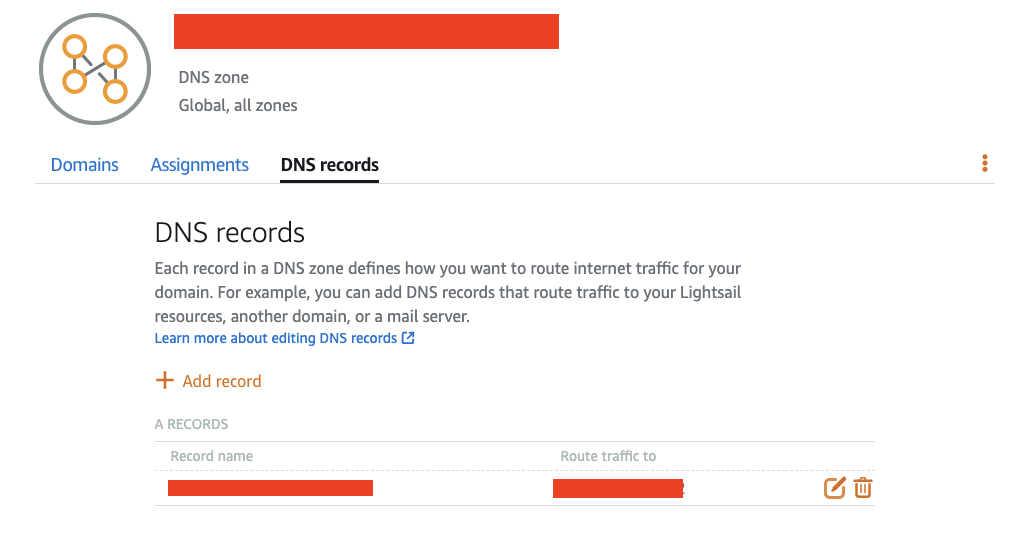
Once the domain assignment is complete, go to the “DNS records” tab. You will see that a new A Record has been added. This A Record specifies which public IP your domain should be directed to:
4 Configuring Name Servers in Namecheap
After finishing the setup in Lightsail, the AWS Domain Name System has now established the necessary information linking your domain to the server. Next, we still need to configure some settings with the registrar where you purchased the domain (in this case, Namecheap).
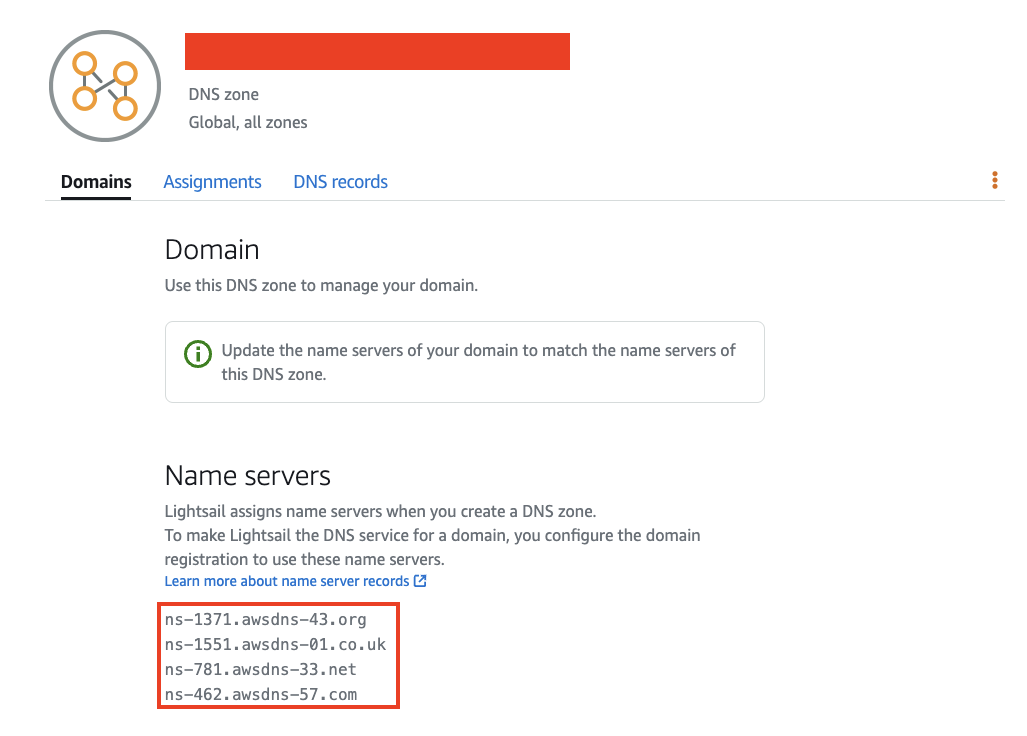
First, return to the “Domains” tab page in Lightsail and note the AWS Domain Name Server addresses at the bottom of the page:
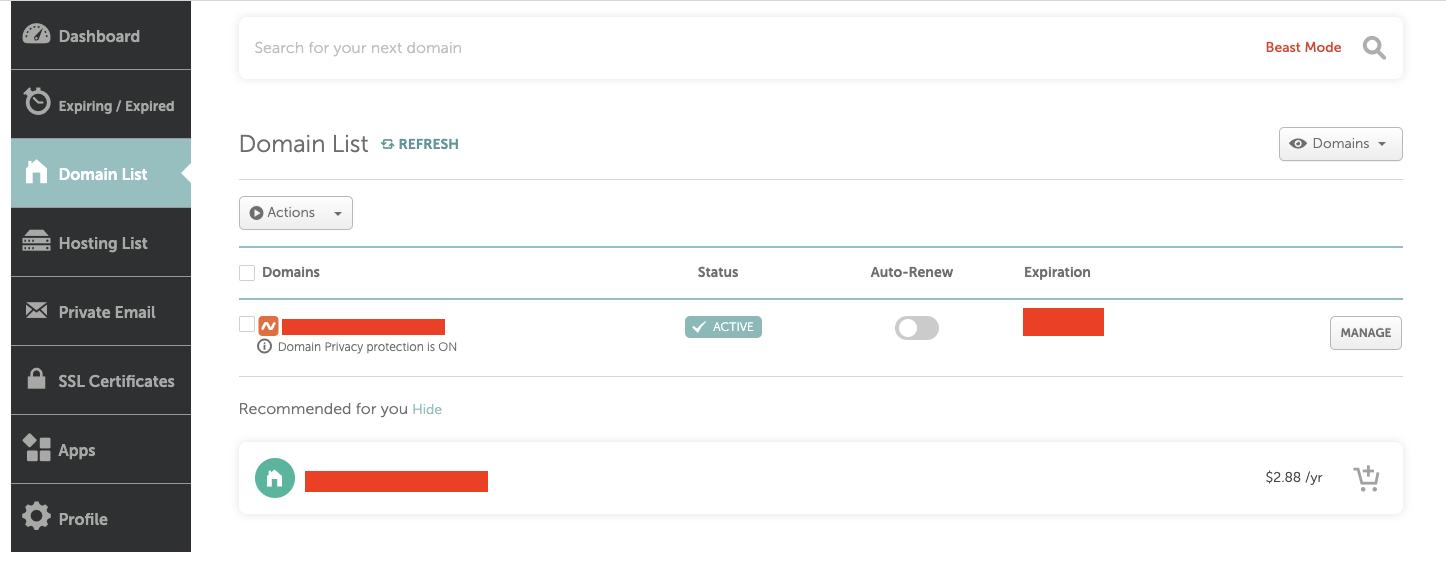
Next, in Namecheap’s left sidebar menu, select “Domain List” and click “MANAGE” next to your domain:
In the Name Servers section, select “Custom DNS” and paste the four AWS Name Server addresses you found in Lightsail:
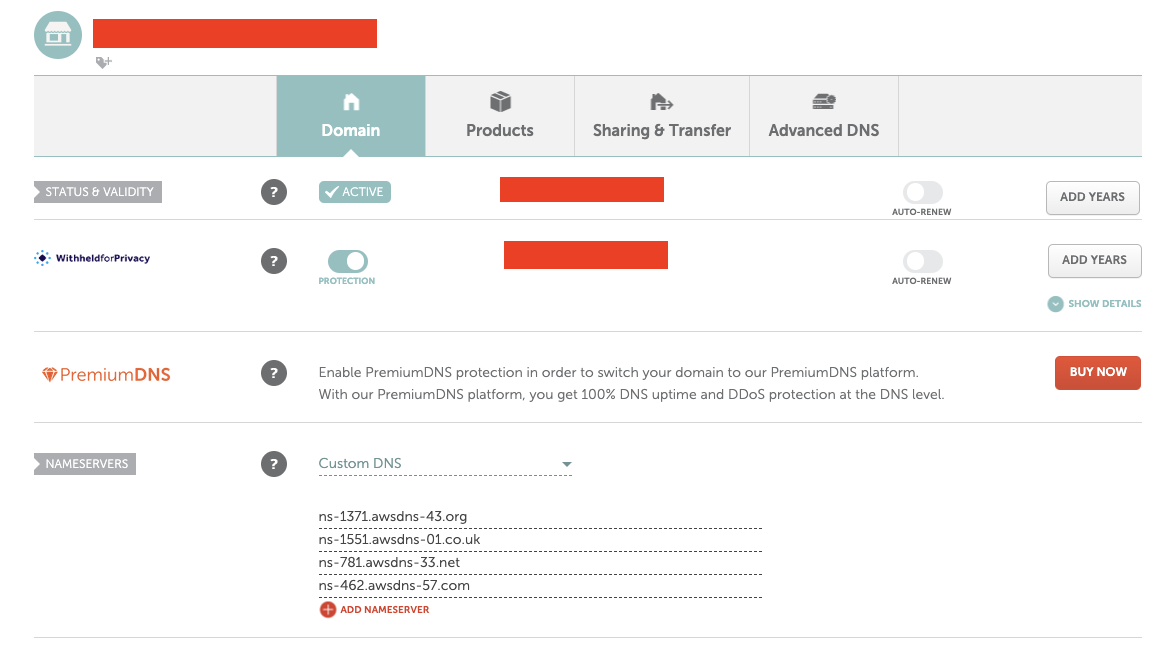
After entering the Custom DNS information, remember to click the green checkmark in the upper right corner to save your changes!
5 Checking Propagation Status with DNS Checker
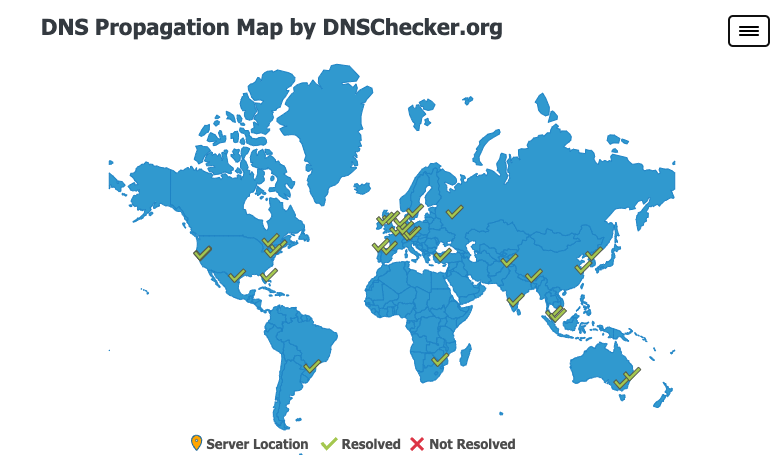
After completing the three steps above, all the basic settings are done. The next step is to wait for the DNS record to propagate to DNS servers worldwide. You can use DNS Checker to enter your domain and see which global DNS servers your domain’s DNS records have propagated to. After some time, you will see that some DNS servers around the world have our DNS records:
Here’s a brief explanation of DNS records: There are many different types of DNS records, which are essentially different ways of describing what a domain maps to.
In our Lightsail configuration in Step 2, we primarily added an A Record (a type of DNS record). An A Record states which server (public IP) the domain points to.
Once our DNS records are recorded on DNS servers worldwide, when a user anywhere in the world types our domain into their browser and hits Enter, the browser can ask a nearby DNS server where this domain points. The browser can then send a request to the correct server (the one actually hosting our WordPress site) to view our website.
6 Configuring the Domain in WordPress
Once our domain’s DNS records have finished propagating, we should be able to access our WordPress site by typing the domain into the browser. However, you might notice that after the site fully loads, the URL in the address bar changes from your domain back to the server’s public IP. This is mainly because we haven’t adjusted the corresponding settings in our WordPress dashboard:
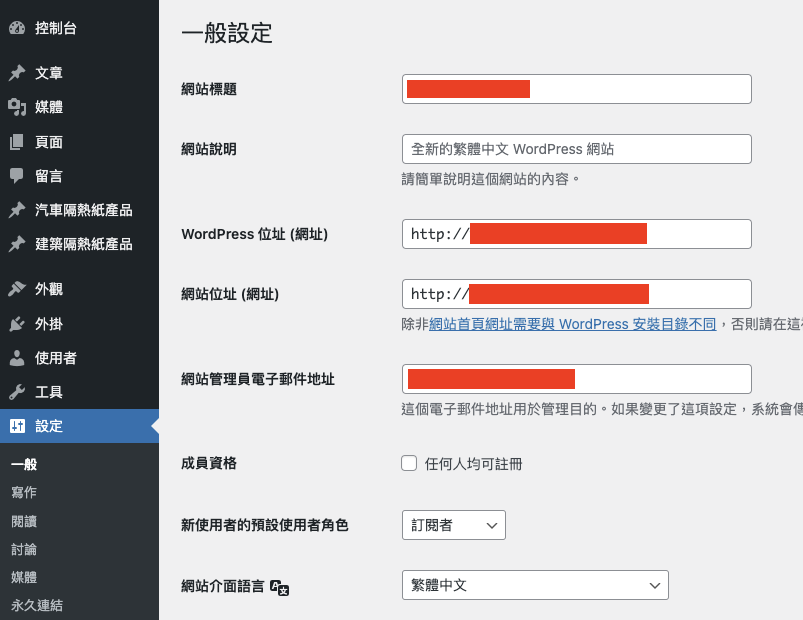
As shown in the image above, we need to go into the WordPress dashboard and change the “WordPress Address (URL)” and “Site Address (URL)” to the correct domain: “http://your_domain”.
7 Conclusion
In this article, we’ve walked through 5 steps (getting a domain on Namecheap, configuring DNS records in AWS Lightsail, setting up name servers in Namecheap, checking propagation status with DNS Checker, and configuring the domain in WordPress) to show you how to get a domain and point it to your website’s server (i.e., your WordPress site). Now, visitors can access your website using your custom domain.